
Theodore Lowe, Ap #867-859
Sit Rd, Azusa New York
Find us here
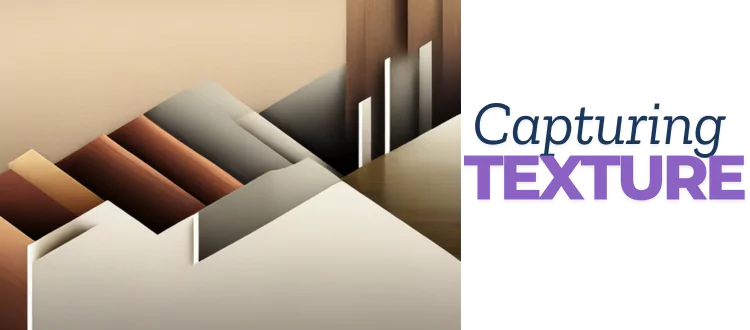
The Art of Capturing Texture
Texture plays a crucial role in enhancing the visual appeal of photographs. It allows photographers to convey the tactile qualities of their subjects, making images more engaging and realistic. Capturing texture effectively requires keen observation and the right techniques. Lighting, angles, and focus are essential elements in bringing out the intricate details of textures.
Natural light often works best, but experimenting with different lighting setups can yield interesting results. Close-up shots and macro photography are particularly effective for showcasing textures. Mastering the art of capturing texture can transform ordinary photos into compelling visual stories.
Choosing The Right Equipment
Capturing texture in photography requires the right equipment. The right tools can make a big difference. Let's explore the essential gear needed.
Cameras And Lenses
The camera is your primary tool. A high-resolution camera captures more detail. This helps in getting the fine textures.
-
DSLR Cameras: These cameras offer great control and flexibility.
-
Mirrorless Cameras: They are lightweight and have high-resolution sensors.
Choosing the right lens is equally important. Macro lenses are great for capturing intricate textures.
|
Lens Type |
Best For |
|---|---|
|
Macro Lens |
Close-up textures |
|
Wide-Angle Lens |
Large textured surfaces |
Essential Accessories
Accessories enhance your texture photography. They help in achieving the perfect shot.
-
Tripod: Keeps the camera steady for sharp images.
-
Lighting: Proper lighting reveals textures better.
-
Polarizing Filter: Reduces glare and enhances color.
Using these tools, you can capture stunning textures. Remember, the right equipment is key.
Lighting Techniques
Lighting is crucial in capturing texture in photography. Proper lighting can highlight the fine details and intricacies of any subject. Understanding how to use both natural and artificial light can elevate your texture photography.
Natural Light
Natural light is a favorite for many photographers. It is soft, diffused, and brings out the best in textures.
-
Golden Hour: This is the time just after sunrise or before sunset. The light is warm and soft, perfect for highlighting textures.
-
Midday Sun: Direct sunlight can create harsh shadows. Use it to emphasize rough textures.
-
Overcast Days: Clouds act as a natural diffuser. This softens the light and reduces harsh shadows.
|
Time of Day |
Lighting Quality |
Best for |
|---|---|---|
|
Golden Hour |
Warm and Soft |
Highlighting textures |
|
Midday Sun |
Harsh and Direct |
Emphasizing rough textures |
|
Overcast |
Soft and Diffused |
Reducing shadows |
Artificial Light
Artificial light offers control and consistency. This makes it ideal for studio photography.
-
Softboxes: These diffuse the light, creating soft shadows. They are great for smooth textures.
-
Spotlights: These focus light on a specific area. Use them to highlight intricate details.
-
LED Panels: These provide adjustable light intensity. They are versatile and can mimic natural light.
Using a combination of natural and artificial light can yield stunning results. Experiment with different setups to find what works best for your subject.
Composition Tips
Capturing texture in photography requires a keen eye for detail. Composition plays a critical role in highlighting texture. This section explores essential composition tips.
Framing And Angles
Framing is crucial to emphasize texture. Use natural frames like windows or doorways. These elements can draw attention to the textured subject.
Angles also impact the texture's visibility. Shooting from a low angle can make textures more pronounced. Experiment with high angles to see different effects.
|
Technique |
Effect |
|---|---|
|
Low Angle |
Enhances depth and texture |
|
High Angle |
Offers a flat, less textured view |
Focus And Depth Of Field
Focus is key to capturing sharp textures. Use manual focus for better control. Auto-focus might miss the fine details.
Depth of field adds dimension to texture. A shallow depth of field can isolate the texture from the background. This method makes the texture stand out.
-
Shallow Depth of Field: Isolates texture from background
-
Deep Depth of Field: Includes more elements in focus
Use a macro lens for extreme close-ups. This lens type captures minute textures effectively.
Post-processing
Post-processing is a crucial step in enhancing the texture in your photos. It involves refining the details and bringing out the nuances of textures that might get lost in the raw image. Below, we explore basic and advanced editing techniques for capturing texture.
Basic Editing
Basic editing tools help improve the overall look of your image. Start with adjusting the contrast and brightness. These settings can make textures pop. Use the clarity slider to add sharpness to the details.
-
Contrast: Adjust this to highlight differences between light and dark areas.
-
Brightness: Modify this to ensure the image is well-lit.
-
Clarity: Enhance this to make textures more distinct.
Consider cropping your image to focus on the textured area. Straighten your image if needed. This makes the texture the focal point.
Advanced Techniques
Advanced techniques take your texture photography to the next level. Use layer masks to apply effects to specific areas. This allows you to enhance textures without affecting the whole image. Experiment with dodging and burning to add depth and dimension.
-
Layer Masks: Apply adjustments only where needed.
-
Dodging: Lighten specific areas to highlight details.
-
Burning: Darken areas to add contrast and depth.
Use the high-pass filter to sharpen intricate textures. Set it to a low radius for subtle enhancement. Adjust the blend modes to find the best look for your texture.
|
Technique |
Purpose |
|---|---|
|
Layer Masks |
Selective adjustments |
|
Dodging |
Lighten specific areas |
|
Burning |
Darken specific areas |
|
High-Pass Filter |
Enhance texture sharpness |
Advanced techniques require practice but yield amazing results. Experiment with these methods to see what works best for your images.
Common Mistakes
Mastering the art of capturing texture in photography can be tricky. Even skilled photographers can make common mistakes. This section will help you avoid these pitfalls.
Overprocessing
Overprocessing is a frequent mistake in texture photography. Photographers often overdo it with editing software. This can make textures look unnatural. Keep edits simple to maintain the authenticity of the textures.
Here's a quick comparison of natural vs. overprocessed images:
|
Natural Image |
Overprocessed Image |
|---|---|
|
|
Ignoring Backgrounds
Ignoring backgrounds is another common error. Backgrounds can either complement or distract from the main texture. Always consider what’s behind your subject.
Here are some tips to manage backgrounds effectively:
-
Choose simple, non-distracting backgrounds.
-
Use a shallow depth of field to blur the background.
-
Avoid cluttered environments.
By paying attention to these details, you can enhance your texture photography skills.
Inspiration And Ideas
The art of capturing texture is a fascinating aspect of photography. It adds depth and emotion to images. Finding inspiration and ideas is key to mastering this skill. Below are some creative avenues to explore for capturing stunning textures.
Nature And Landscapes
Nature offers endless opportunities for capturing texture. The rough bark of a tree, the delicate petals of a flower, or the intricate patterns of leaves can create stunning visuals.
-
Forest Floors: Fallen leaves, twigs, and moss.
-
Rocky Shores: Pebbles, sand, and shells.
-
Mountain Ranges: Jagged rocks and snow-covered peaks.
Using natural light enhances these textures. Early morning or late afternoon light works best. Experiment with different angles and perspectives. This will bring out the finest details.
Urban And Industrial
Urban environments offer unique textures. Think of the gritty surfaces of old buildings or the smooth lines of modern architecture.
|
Urban Elements |
Industrial Elements |
|---|---|
|
Graffiti Walls |
Rusty Pipes |
|
Cobblestone Streets |
Metal Grates |
|
Brick Walls |
Concrete Slabs |
Play with shadows and highlights to emphasize textures. Use a tripod for steadier shots. Urban and industrial scenes often benefit from black and white photography. This technique highlights textures even more.
Conclusion
Mastering the art of capturing texture can elevate your photography skills. Focus on lighting and angles to highlight details. Practice regularly to improve your technique. Texture adds depth and interest to your images, making them more engaging. Keep exploring and experimenting for unique results.
Related blog posts
How to Isolate Hair for Background Removal in Photoshop
Are you tired of spending hours trying to perfectly isolate hair from a background in Photoshop, only to end up with messy, unnatural edges? You're not alone.

Clipping Path Associate has empowered businesses globally for over 12 years. A passionate team is dedicated to providing meticulous photo editing services. Expertise is offered in a range of areas, from precise clipping paths to flawless image retouching. The company offers straightforward yet impactful solutions tailored for photographers, e-commerce enterprises, advertising agencies, web design firms, magazine publishers, printing companies, and more.
We Accept : 